When I returned from my vacation, my cell phone refused to turn on, so I ended up having to get a new one. I decided it needed a protective case, so I made it a little drawstring bag:
Your phone may differ in size, so I've tried to indicate how to figure out the correct size for yours! All seam allowances are 1/4".
Here, the fabric is folded at the bottom. It's a non-directional fabric, so that worked in this case. I decided that, taking the thickness of the phone into account, it measured about 3x5 inches. I added 3/4 inch at the bottom and an inch on one side for a total measurement of 11 1/2x4 inches.
Cut out and sew up the sides with a 1/4" seam. I used my serger, since it's still pretty new to me and I like getting practice on it. Turn right side out.
Cut two pieces of fabric for the drawstring casings, 3 1/2x1 1/2 inches. If your measurements are different, they should be the width of the finished body of the bag. So, if the body was 4 inches wide, then 1/4 inch for seams on either side, that's 3 1/2. This way the finished casings will be just a little shorter than the width of the bag.
Overedge the sides...
 |
| You should probably use a matching thread color for edging the casings, but I was too lazy to change the thread in the serger. It's a pain. |
Also cut a piece of fabric two times the finished width of the bag, plus 1/2 inch for seam allowance--so here, 2 x 3 1/2 + 1/2= 7 1/2 inches. This will be the ruffle at the top. Sew short edges together, right sides together.
Fold in half so the seam is on the inside and the right sides are visible on both the outside and the inside of the tube. The raw edges will be on one side. Press.
Fold the short ends of the casing strips in 1/4, then press in half lengthwise, wrong sides together, as seen in the right of this picture:
Now, for some fancy pinning. You want to pin the ruffle to the outside of the body of the bag, and the casings in between (one on each side) with all the raw edges aligned.
I should have taken another picture, but in this one you can see the white in between the purple layers.
Sew and overlock the raw edges.
 |
| Sewing machine was used here. Sergers are not made for sewing tiny things, apparently. |
Now, when you flip the ruffle up, it should look like this:
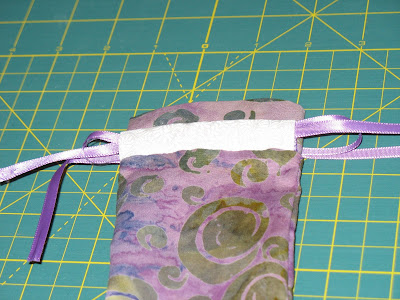
Cut two lengths of ribbon, each about four times as long as the width of the bag--or however long you want them (maybe long enough to go around your wrist once the bag is closed?). Thread each ribbon through both casings, starting at opposite sides as shown below, and knot the ribbon ends together.
You'll notice that the casings can either lie upwards, towards the opening of the bag, or downwards. There should be plenty of room for them to lie downwards, so you have more ruffle showing at the top, but if you find the fit is tight at the top they could also lie upwards, giving you more room for your electronic goodies.
 |
| In with you, phone! |
After seeing mine, my friend, who recently got a new smartphone, wanted one too.
She has an Android Evo phone--here are the dimensions I used for her bag:
Body: 8 1/2"x7 1/2" (the fabric was directional, so you'd fold the 8 1/2" side in half and sew one side and the bottom seam with these dimensions)
Casings: 4"x1 1/2"
Ruffle: 8 1/2"x4" (I made it a bit bigger, since it was a bigger bag)
Next, I have to work up a phone case that closes with elastic for someone who doesn't like ruffles and drawstrings! :)


No comments:
Post a Comment